
Let’s figure out how to use a prop in react.
If we look at Title Component we have the name as “Timeline” but what if we wanted to use the same component for something else like “Contacts”, or “Settings” or just about anything else. We don’t want to have to go in and change the h1 element every time. We want to have some way of getting that data dynamically.
To pass in a prop we do this the same way we would set an attribute to an HTML tag.
In our Component code we have

This is the code that we will be accessing and changing. We have the text as “Timeline for now but we will change it.
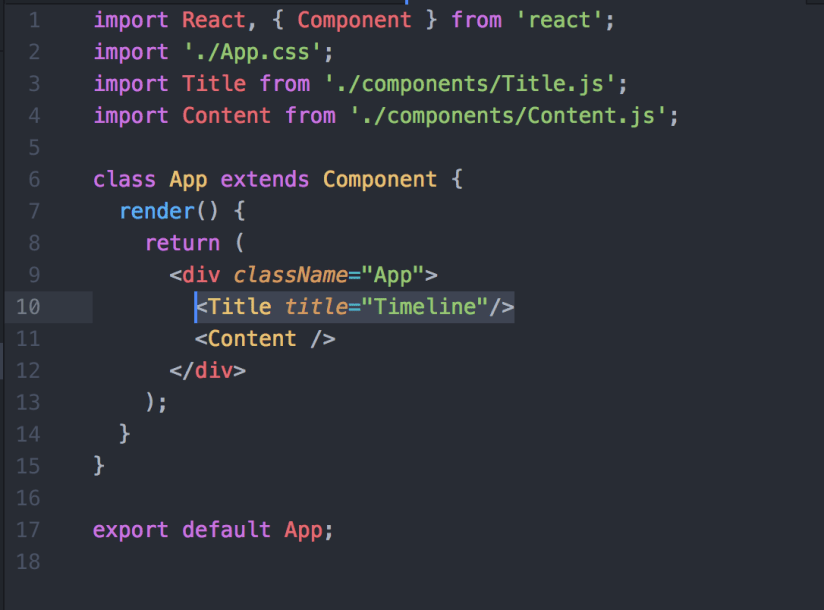
In our App.js file we use <Title /> to refer to the component. if we want to pass in our text instead of hardcoding it. So we set a new attribute in this case I called it title but you can call it whatever you want.
<Title title=”Timeline” />
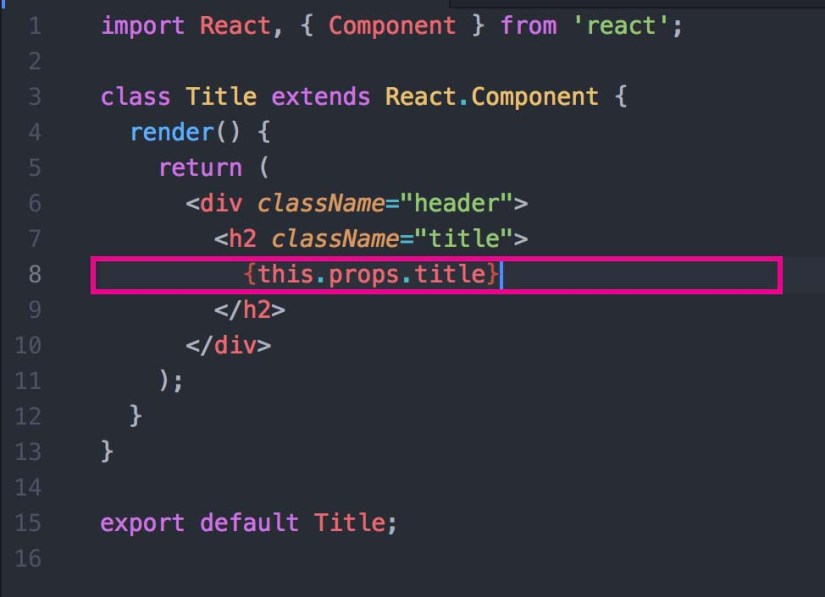
The last thing that we have to do, is to the Title component and that is to tell it that we are passing in data for it to use. instead of using the word “Timeline” we will use
{this.props.title}
this.props is a keyword that will look at it’s parent element and find what the word “title” is supposed to be. In this case it will be “Timeline”.
Now what we can do is we can call the component many different times and each time we can change the text to whatever we want. 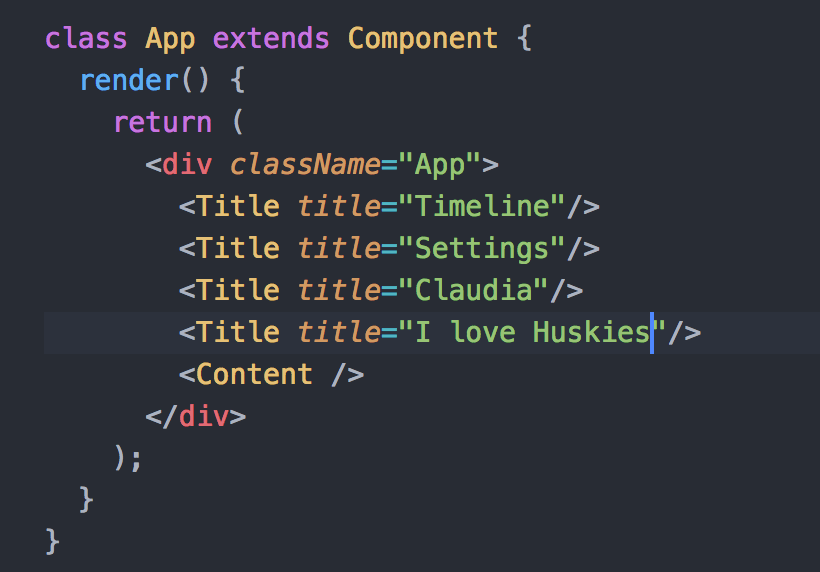
And our app will automatically make those changes for us.

We can pass in more that strings we can do numbers objects and even functions.
Content Component
Let’s take the content component and set some of it’s data dynamically as well. We can pass multiple props into a component just like we can set many attributes in HTML.
Let’s make sure that our Content Component has a space for all the information that we want to pass in.
- Image
- Timestamp
- Content Text
- Number of Comments
Instead of hard coding all the information in ourselves the data will be inside of an array of objects. Each object will be one post. Let’s create that array first, this will be in our app.js file.

Now just like we passed in the title to the <Title /> component we will pass in this activity array to the <Content /> component.
We do this with
<Content activities={activities} />

Now we have to change our content component to display the details inside the template.

This will not run yet but let’s go through the code first because there are some changes worth noting.
The first new line is const{activities} = this.prop;
This line is what’s known as destructuring which allows us to save on typing and instead of using this.props.activities every time we want to get a prop from the parent element all we have to do is use the word activities.
All the places where we want to pass in data will be inside curly braces with the word “activities” like this {activities.user.name} that will be Claudia.
The reason that it’s not working yet is because we have two objects and the whole array is called activities, so we need to use a map function to loop through each item. If you want to learn more about the map function visit the MDN Docs.

Now if we run this we will get our two posts without having to hard code it in.

Our content component is getting very complicated. It is doing two things it holds the data and it displays it as well. We can separate this to make things easier to read and understand.
Let’s take the code that displays all the data and put it in it’s own component. Which will look like this

So now our content component is smaller. Don’t forget to import the ActivityItem.

I know that it seems like a lot to do, but with practice this will be easier each time. Just think about as passing in variables, and using them with this.props.<variable name>
Let me know what you think.
